
How-to
Connect your Make.com, n8n or any other agent to a Chat4Agent widget.
 Make.com
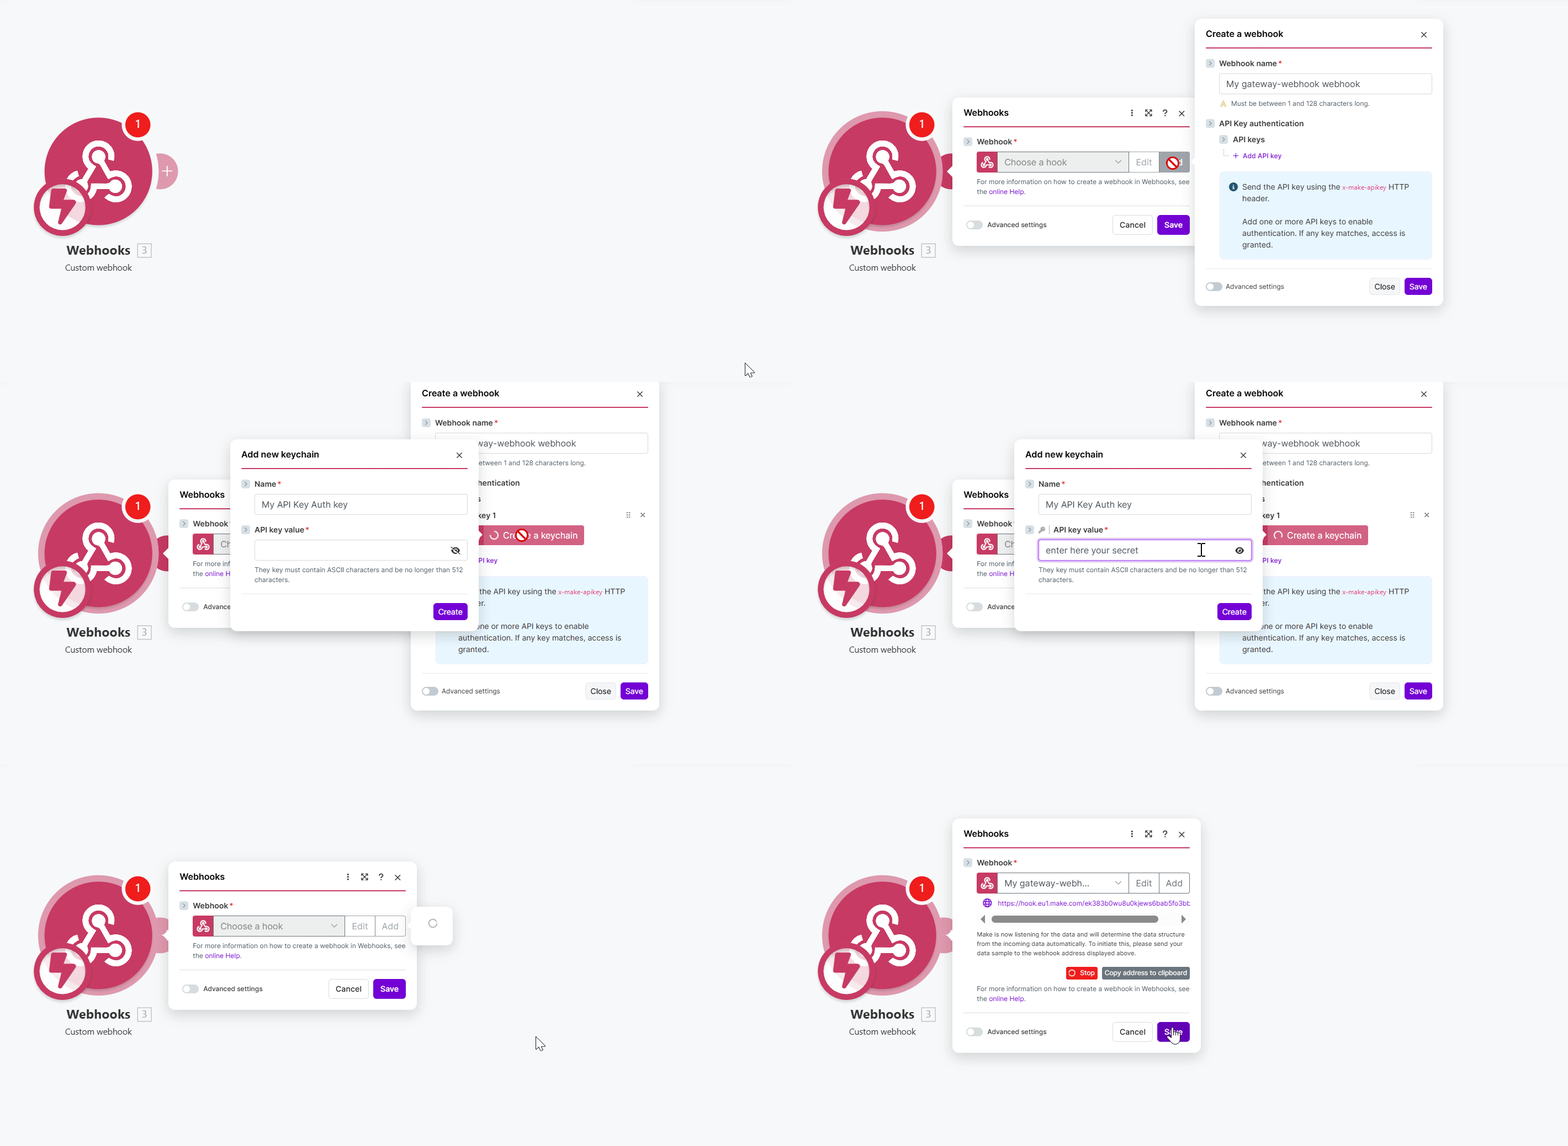
- Add a Custom Webhook trigger.
- Copy its URL into the Agent Webhook URL in your chat's Agent Settings.
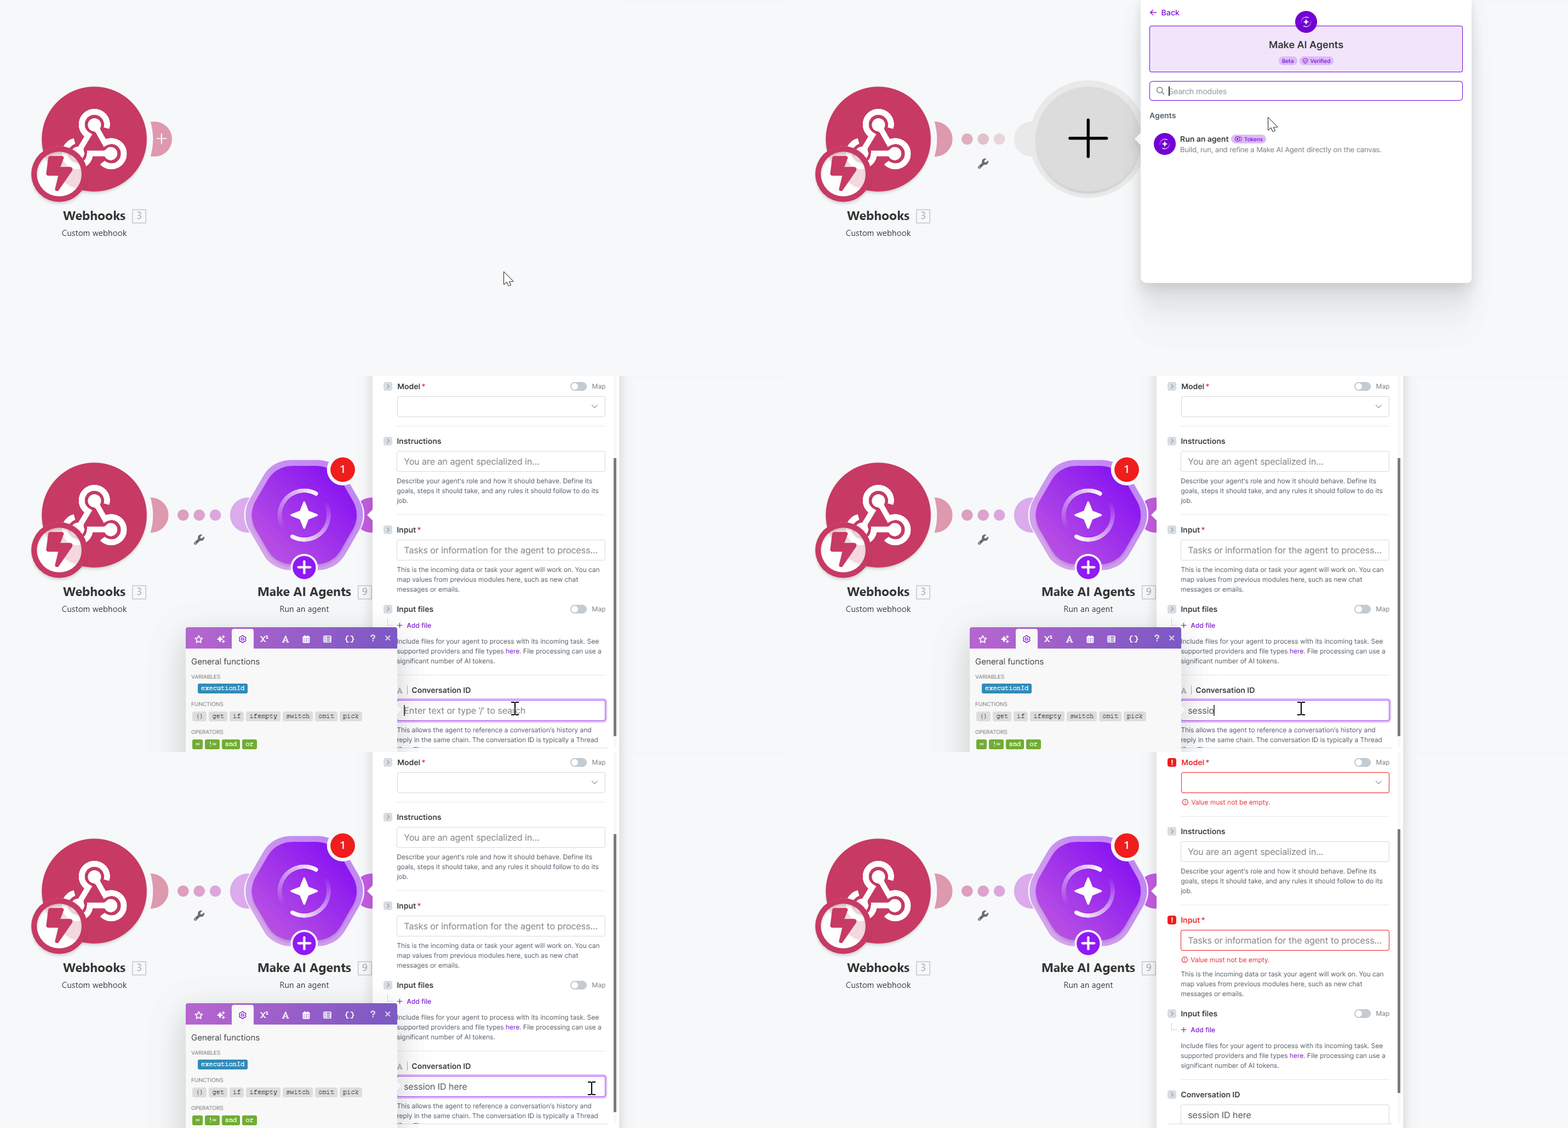
- Add your Make Agent into the canvas.
- Use
{{1.body.Session_Id}}as the conversation key (and{{1.body.Thread_Id}}to segment by thread).
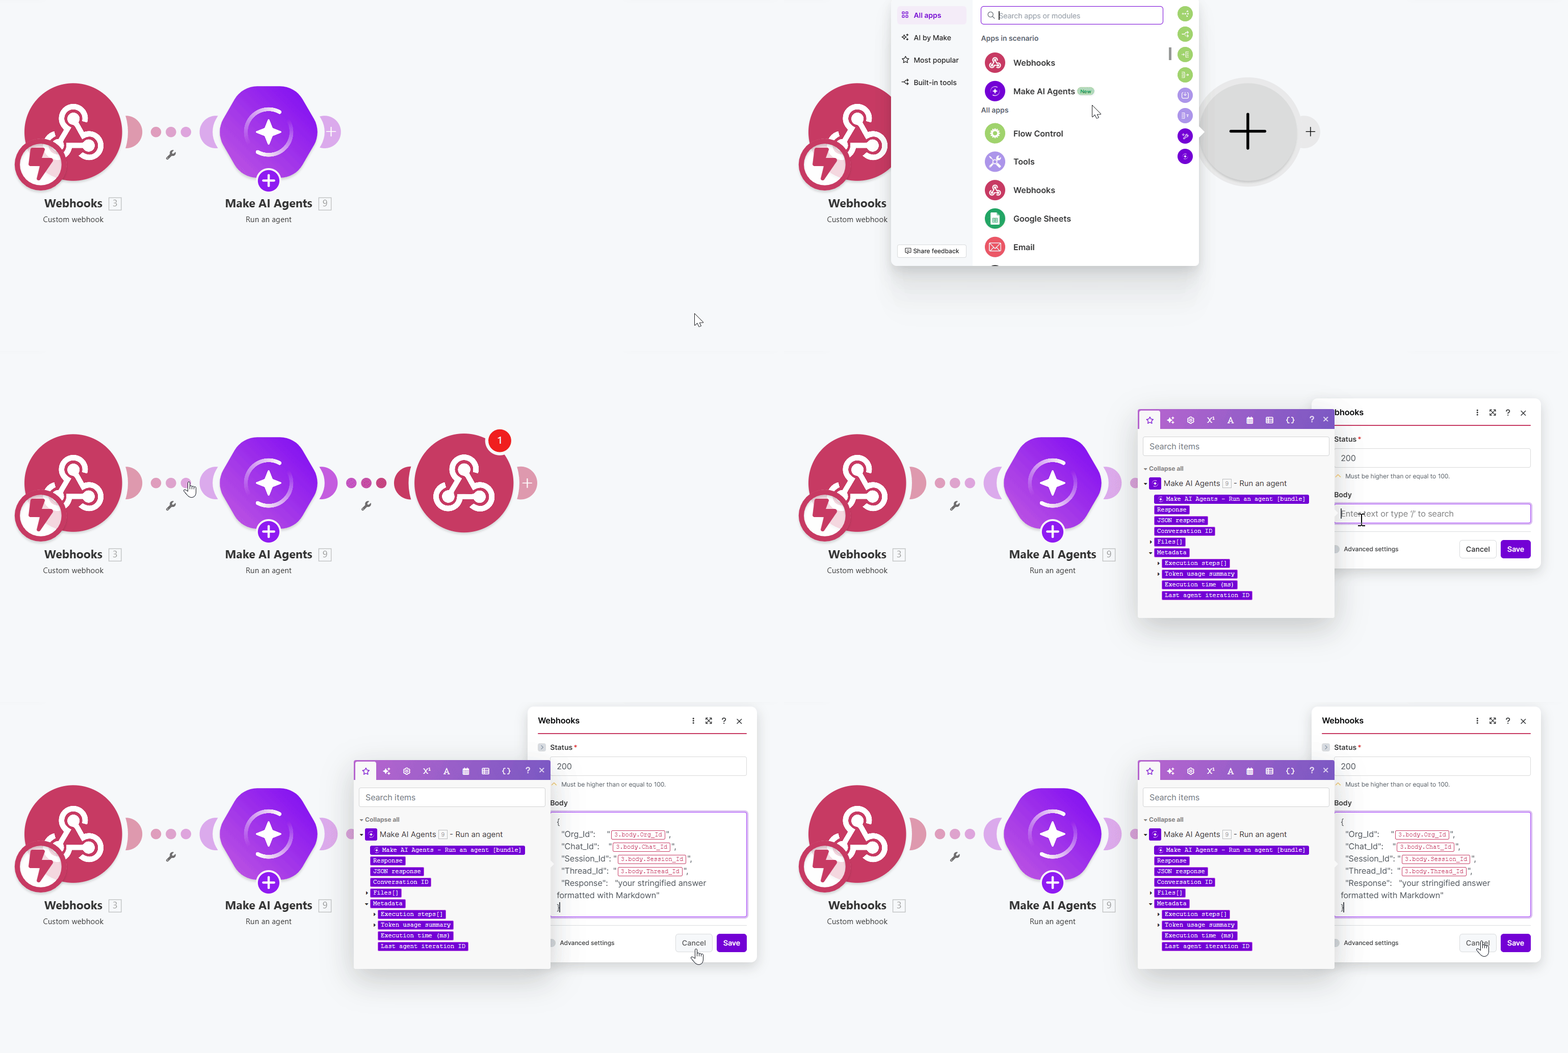
- Final Webhook Response body — a JSON bundle that echoes the four identifiers plus the
Responsestring from your AI Agent:{ "Org_Id": "{{1.body.Org_Id}}", "Chat_Id": "{{1.body.Chat_Id}}", "Session_Id": "{{1.body.Session_Id}}", "Thread_Id": "{{1.body.Thread_Id}}", "Response": "{{<ai-node>.output}}" }
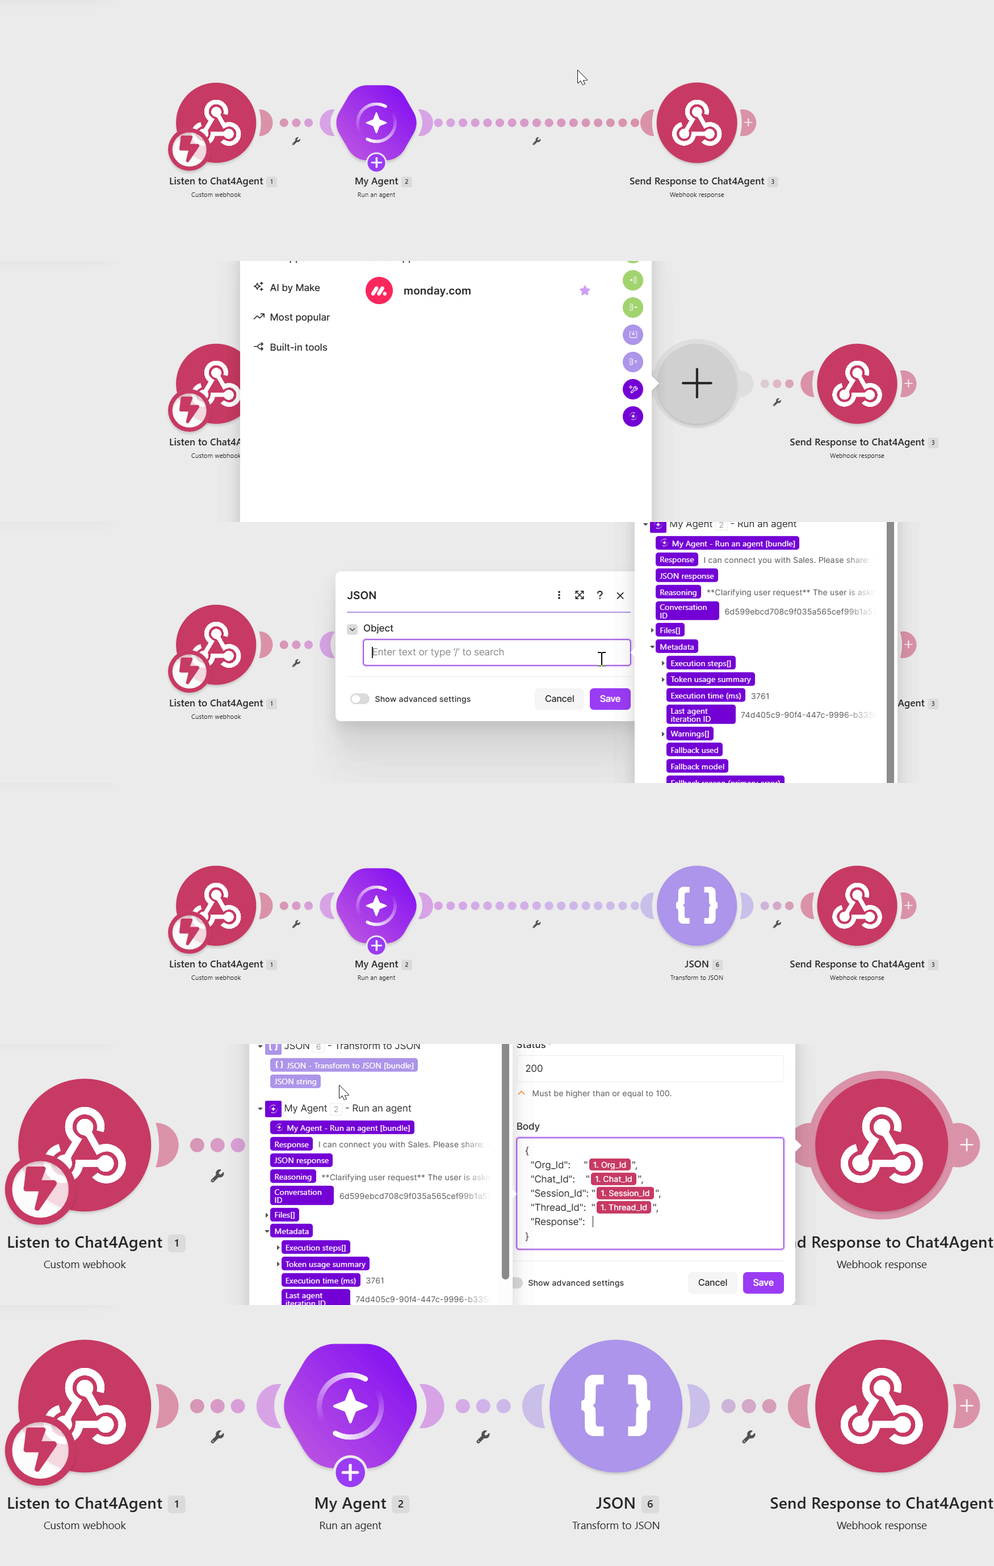
- The response body must be JSON.
- Make's default response is the plain text
Accepted, which the widget cannot parse. - In your Webhook Response module, set the body exactly to the JSON template shown in step 5 above.
- Set Advanced → Custom headers →
Content-Type: application/json. - Important: stringify your Agent's response before putting it in
Response.
 n8n
n8n
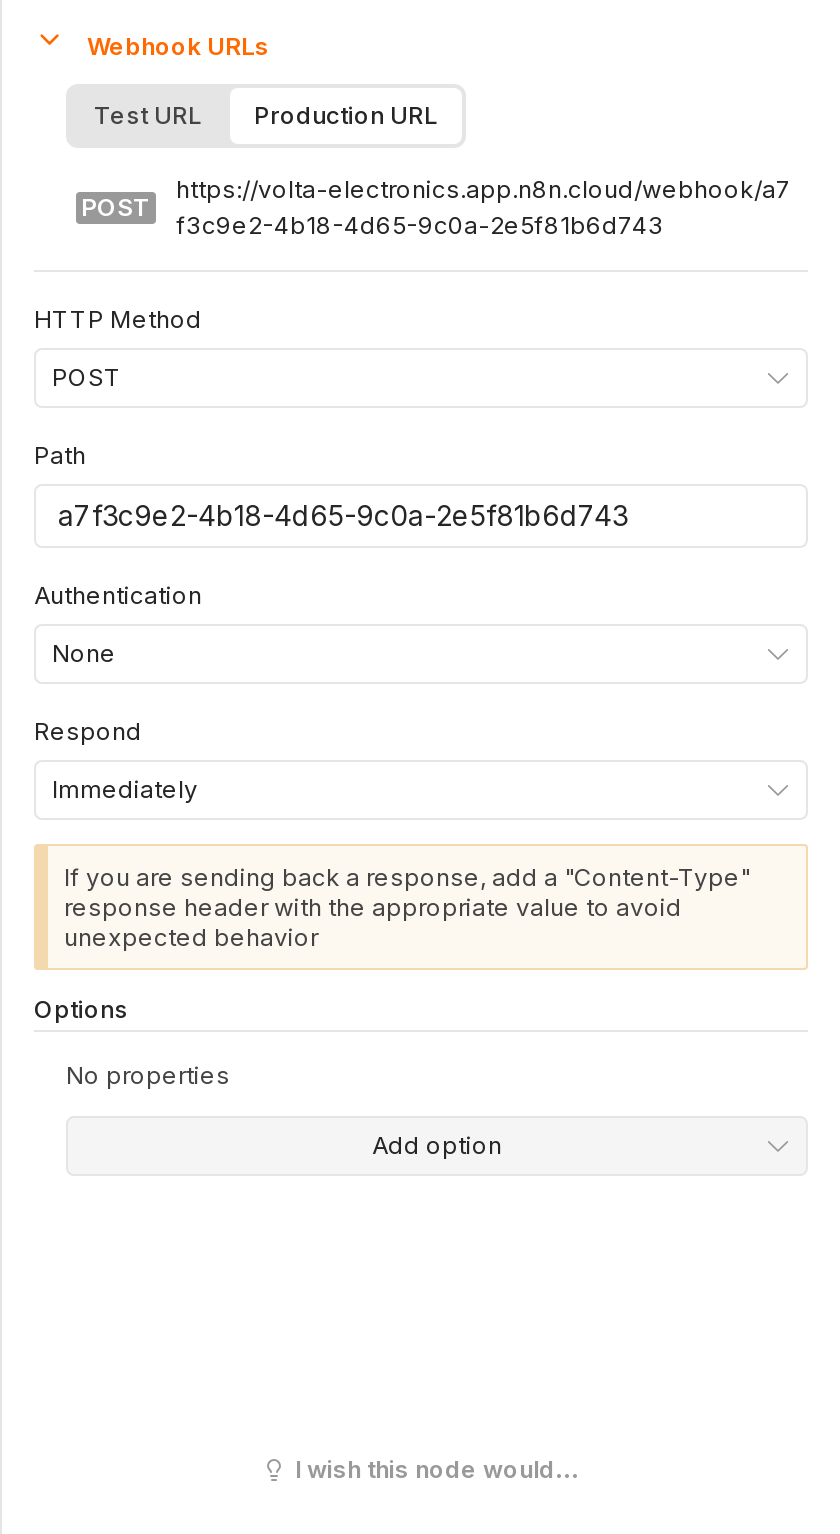
- Add a Webhook node (HTTP Method: POST).
- Open the Production URL tab and copy that URL into the Agent Webhook URL in your chat's Agent Settings.
- That URL has to be reachable from the internet. Chat4Agent calls your webhook from its own servers, not from your browser.
On n8n Cloud it already is, and it looks likehttps://<your-instance>.app.n8n.cloud/webhook/<identifier>— for examplehttps://acme.app.n8n.cloud/webhook/abc123-def456-ghi789. Copy it as it is.
On a self-hosted n8n it usually is not:http://localhost:5678/…means "this machine", and a private address such as192.168.x.xor10.x.x.xonly exists inside your network — we cannot call either. Publish n8n under a public hostname first, over HTTPS, and paste that address instead. If you do not manage the network yourself, this is the part to hand to whoever does: they need to point a public name at the machine and forward the port through to n8n.
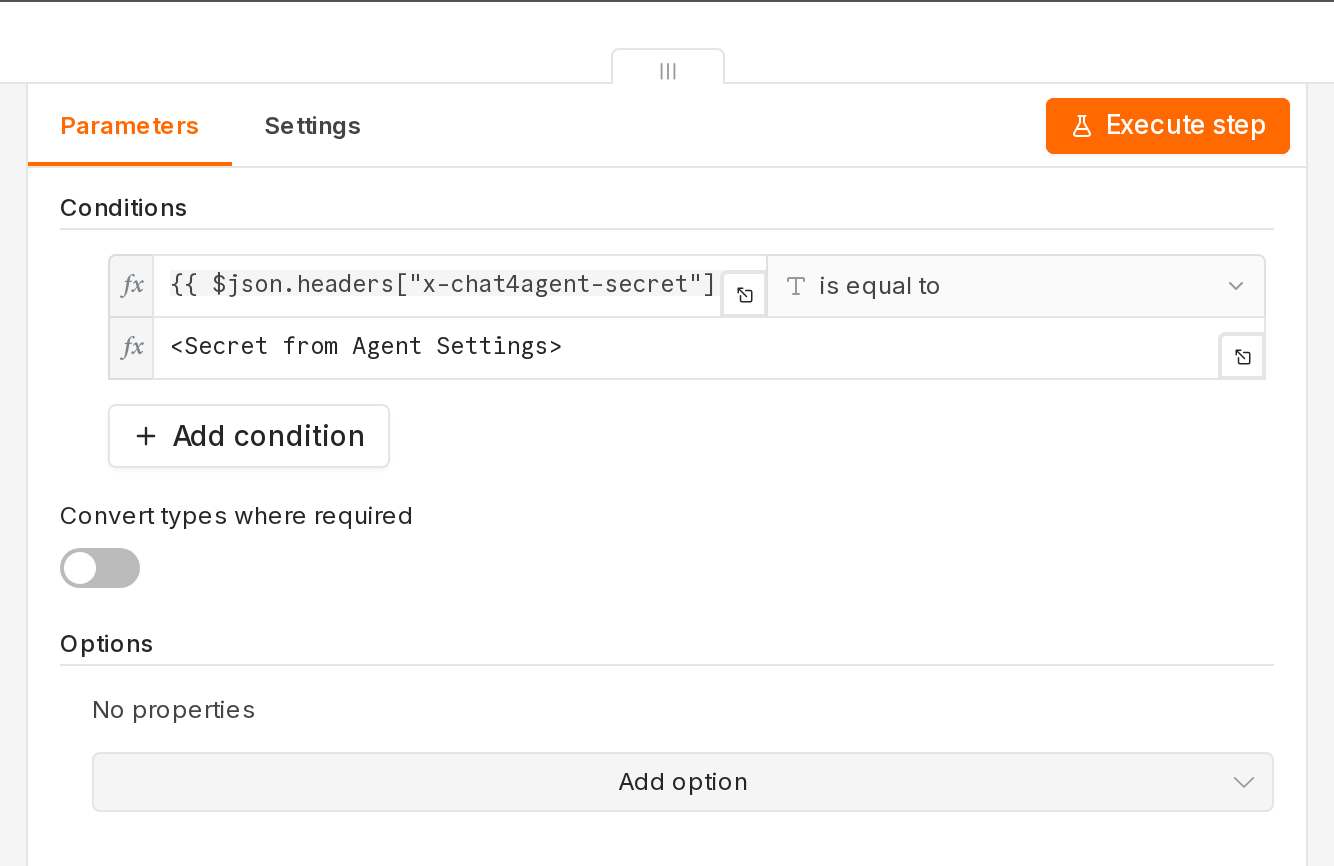
- Add an IF node right after. Condition:
{{ $json.headers["x-chat4agent-secret"] }}equals the Secret from Agent Settings.
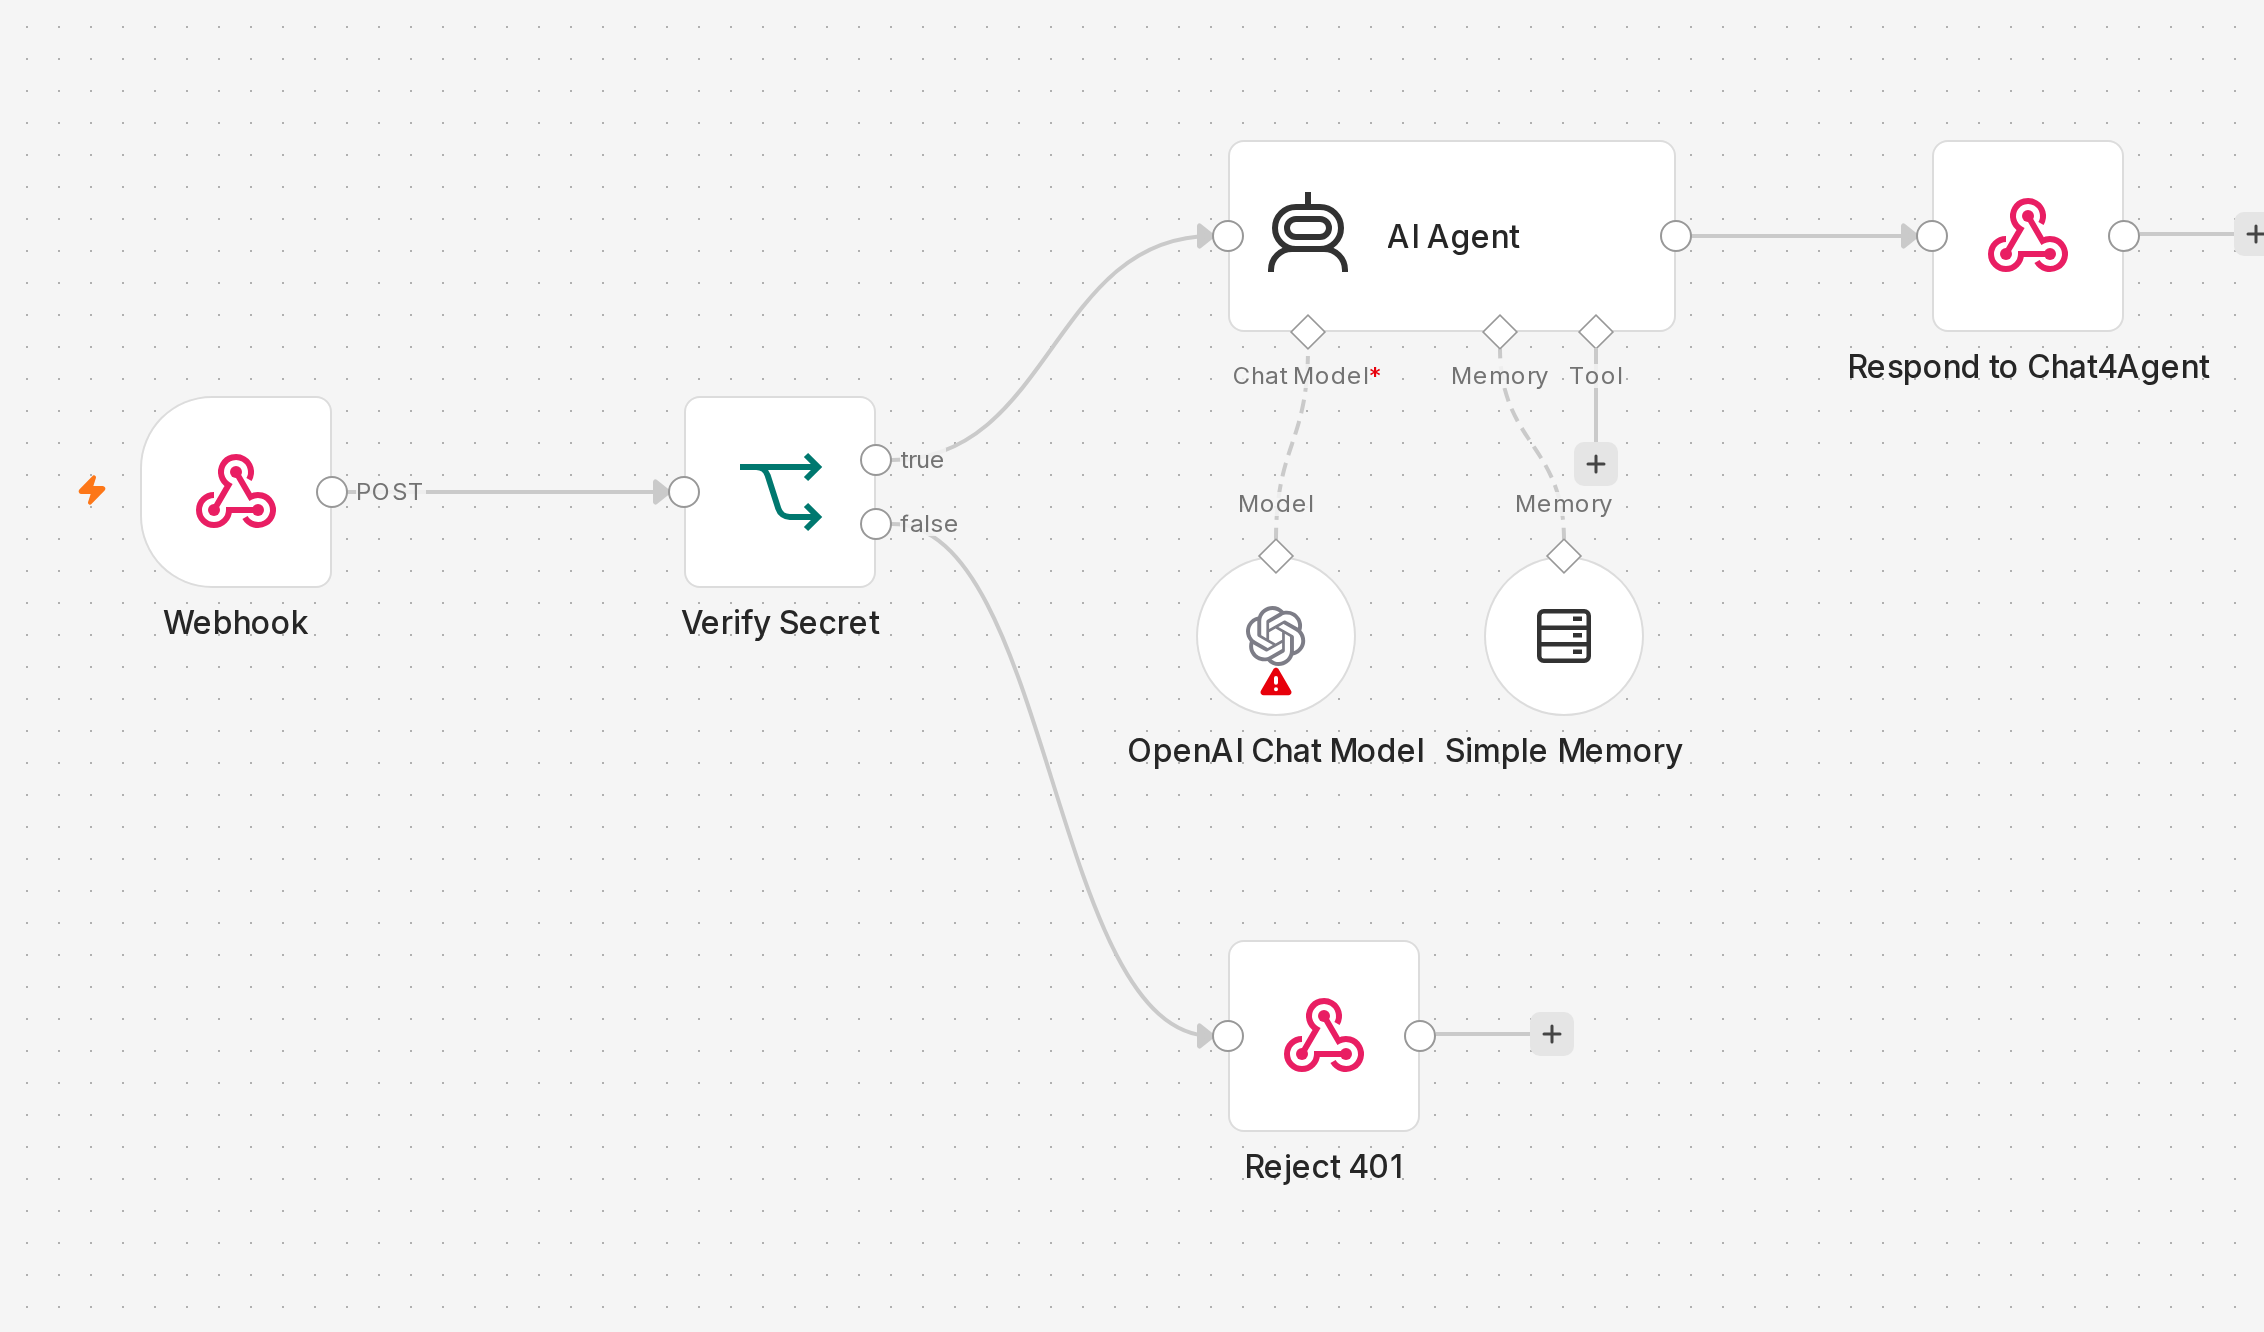
- Wire the
falsebranch to a Respond to Webhook returning status401. - Wire the
truebranch to your AI node, using{{ $json.body.Session_Id }}as the conversation key (add{{ $json.body.Thread_Id }}if needed).
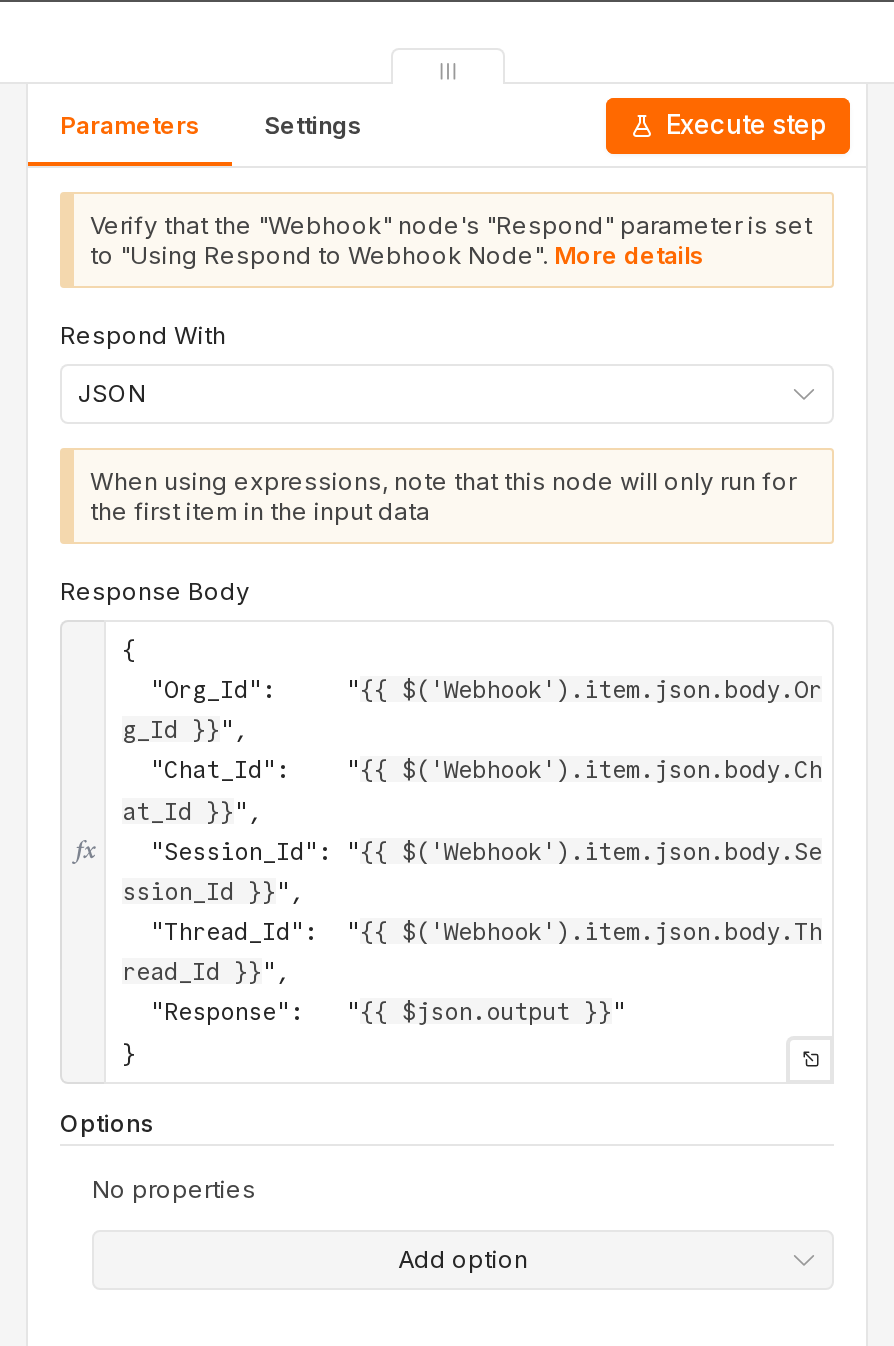
- Final Respond to Webhook body — echo the four identifiers and return the AI output in
Response:{ "Org_Id": "={{ $('Webhook').item.json.body.Org_Id }}", "Chat_Id": "={{ $('Webhook').item.json.body.Chat_Id }}", "Session_Id": "={{ $('Webhook').item.json.body.Session_Id }}", "Thread_Id": "={{ $('Webhook').item.json.body.Thread_Id }}", "Response": "={{ $json.output }}" }
- Any platform that can receive a webhook and answer with JSON works: this tab is the contract.
- Every request the widget sends to your Agent Webhook carries the Secret in four headers with identical values:
x-chat4agent-secret(primary),x-make-secret,x-make-apikeyandx-n8n-secret(platform aliases). - Verify whichever one is easiest in your platform; they always match.
- Reject any request where none matches the Secret shown in Agent Settings.
Step 1Message sent to your Agent
Headers
Content-Type: application/json
x-chat4agent-secret: <Secret>
x-make-secret:       <Secret>    # same value — alias for Make
x-make-apikey:       <Secret>    # same value — alias for Make (API key variant)
x-n8n-secret:        <Secret>    # same value — alias for n8n
Payload
{
  "Org_Id":     "<organization id that owns this chat>",
  "Chat_Id":    "<chat id being served>",
  "Session_Id": "<unique per visitor, rotates every 1h>",
  "Thread_Id":  "<conversation thread id>",
  "Message":    "<visitor text, Markdown allowed>"
}
Step 2Response sent to Chat4Agent
Headers
Content-Type: application/json
Payload
{
  "Org_Id":     "<same as request>",
  "Chat_Id":    "<same as request>",
  "Session_Id": "<same as request>",
  "Thread_Id":  "<same as request>",
  "Response":   "<agent reply text, Markdown allowed>"
}- The
Responsefield must be a JSON string (stringified). - Markdown syntax (headings, bold, italics, lists, links, code blocks) is preserved through the widget.
- Echo the four identifiers back: it keeps every reply traceable.